Amazon AWS SQS
To configure a AWS SQS recipient you first need to create a queue to receive the audit log stream and grant SendMessage and GetURL access to this queue to the Role arn:aws:iam::283217727627:role/IconikShieldSQSWriter.
Create an Amazon AWS SQS Queue
- Start by logging into the AWS Console and go to the Simple Queue Service, or by opening https://console.aws.amazon.com/sqs/home
- Make sure you select the region you want to create your Queue in. The region cannot be changed after the queue has been created.
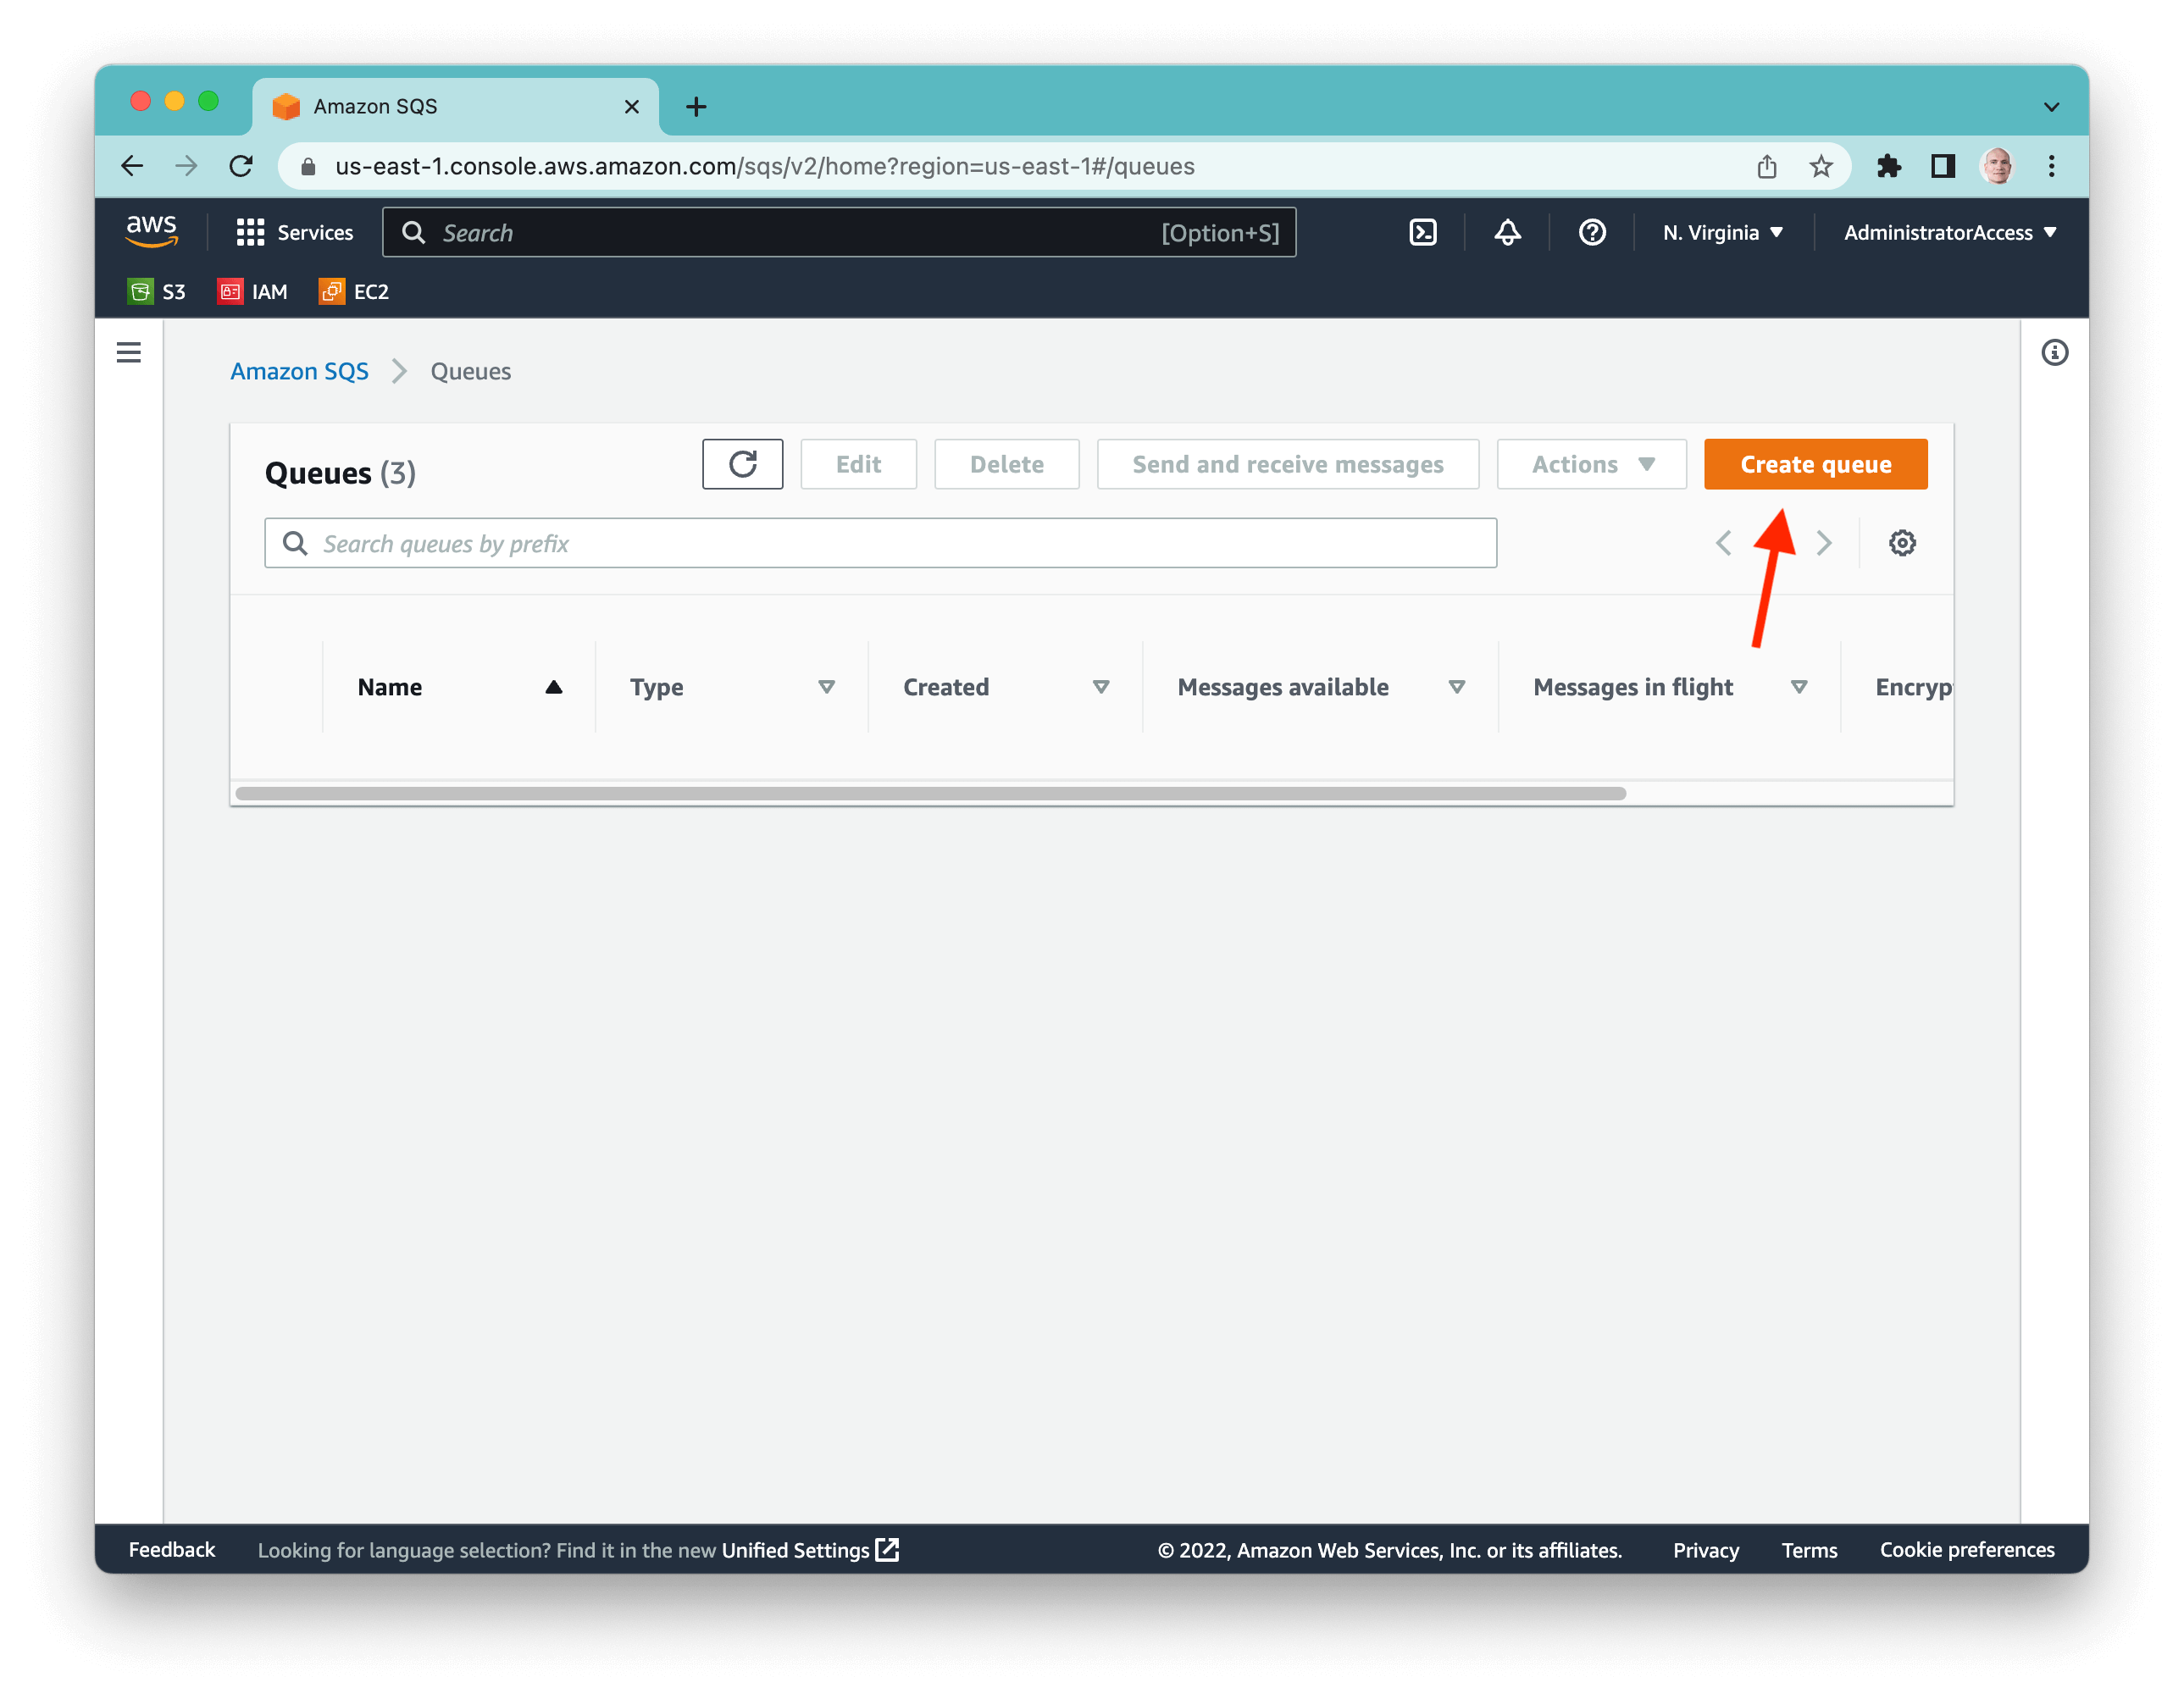
- Click on Create Queue.
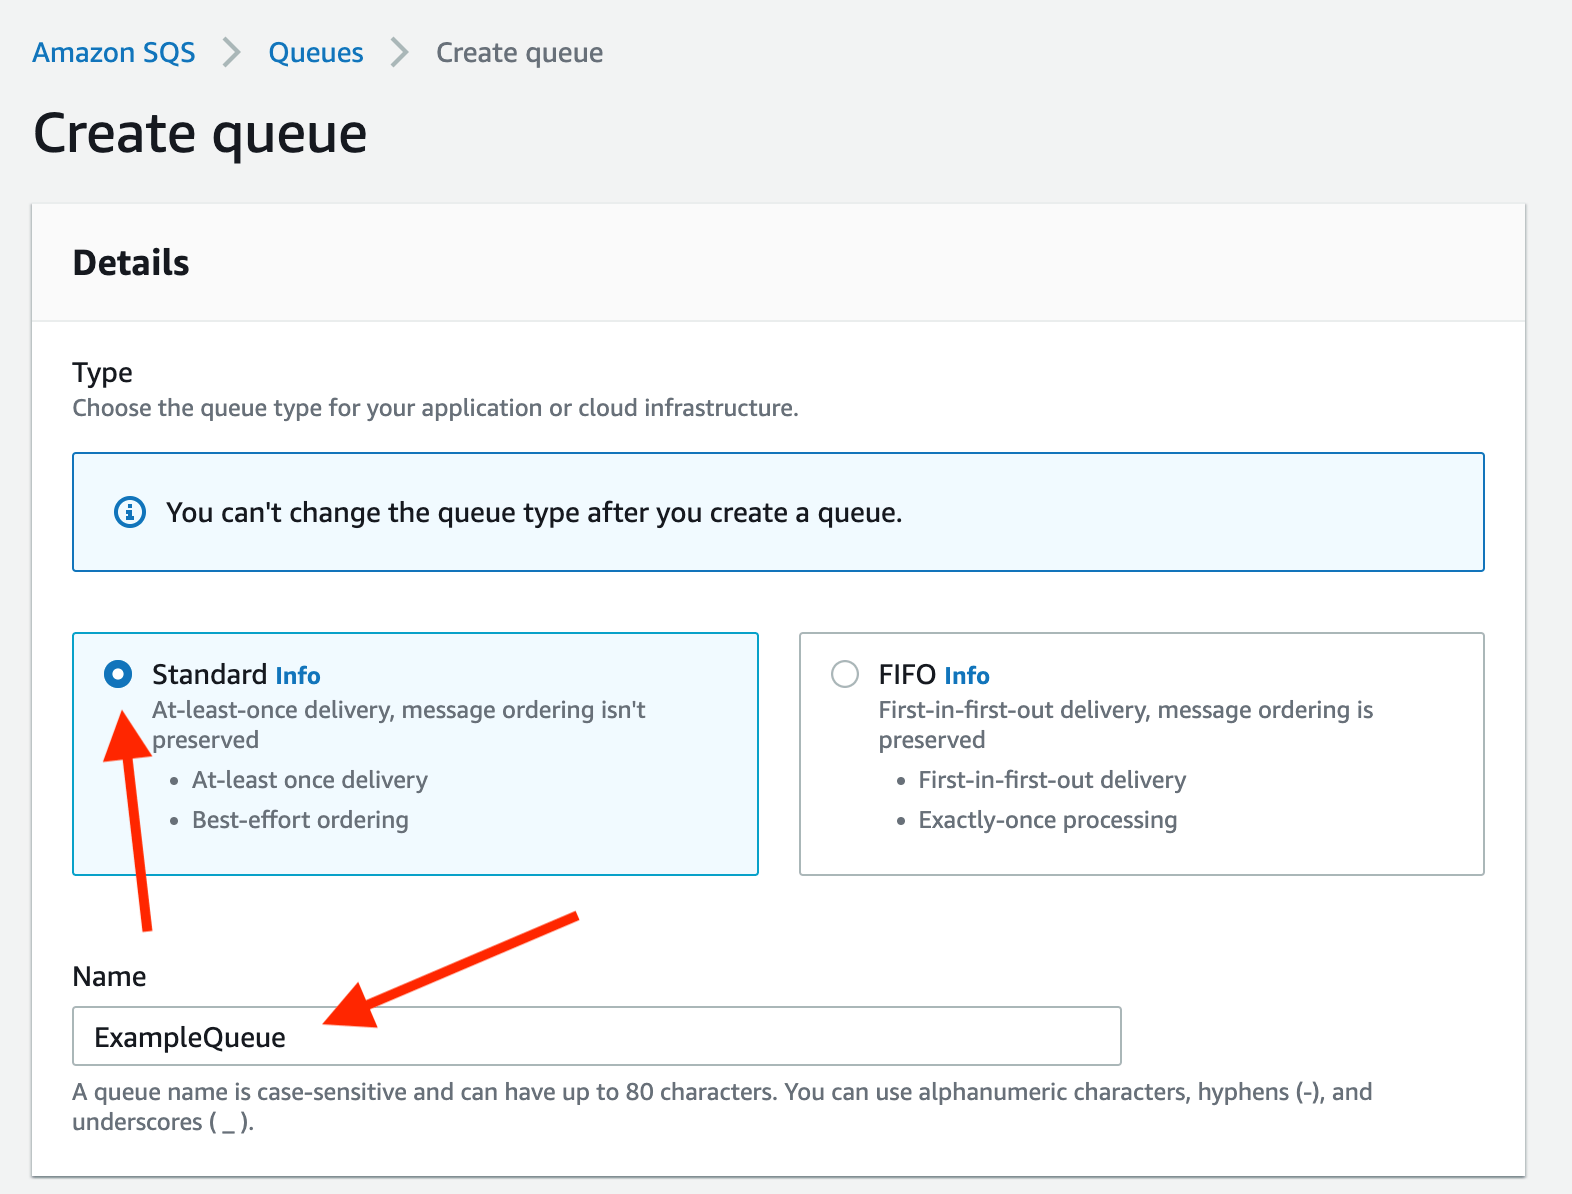
- Select a Standard Queue (iconik log messages may sometimes be delivered out of order on the sender side so a FIFO queue is not recommended)
- Enter a name of the queue.
- Select queue configuration and ecryption settings as per your requirements.
- In the Access Policy pane, set
arn:aws:iam::283217727627:role/IconikShieldSQSWriteras the allowed sender of messages.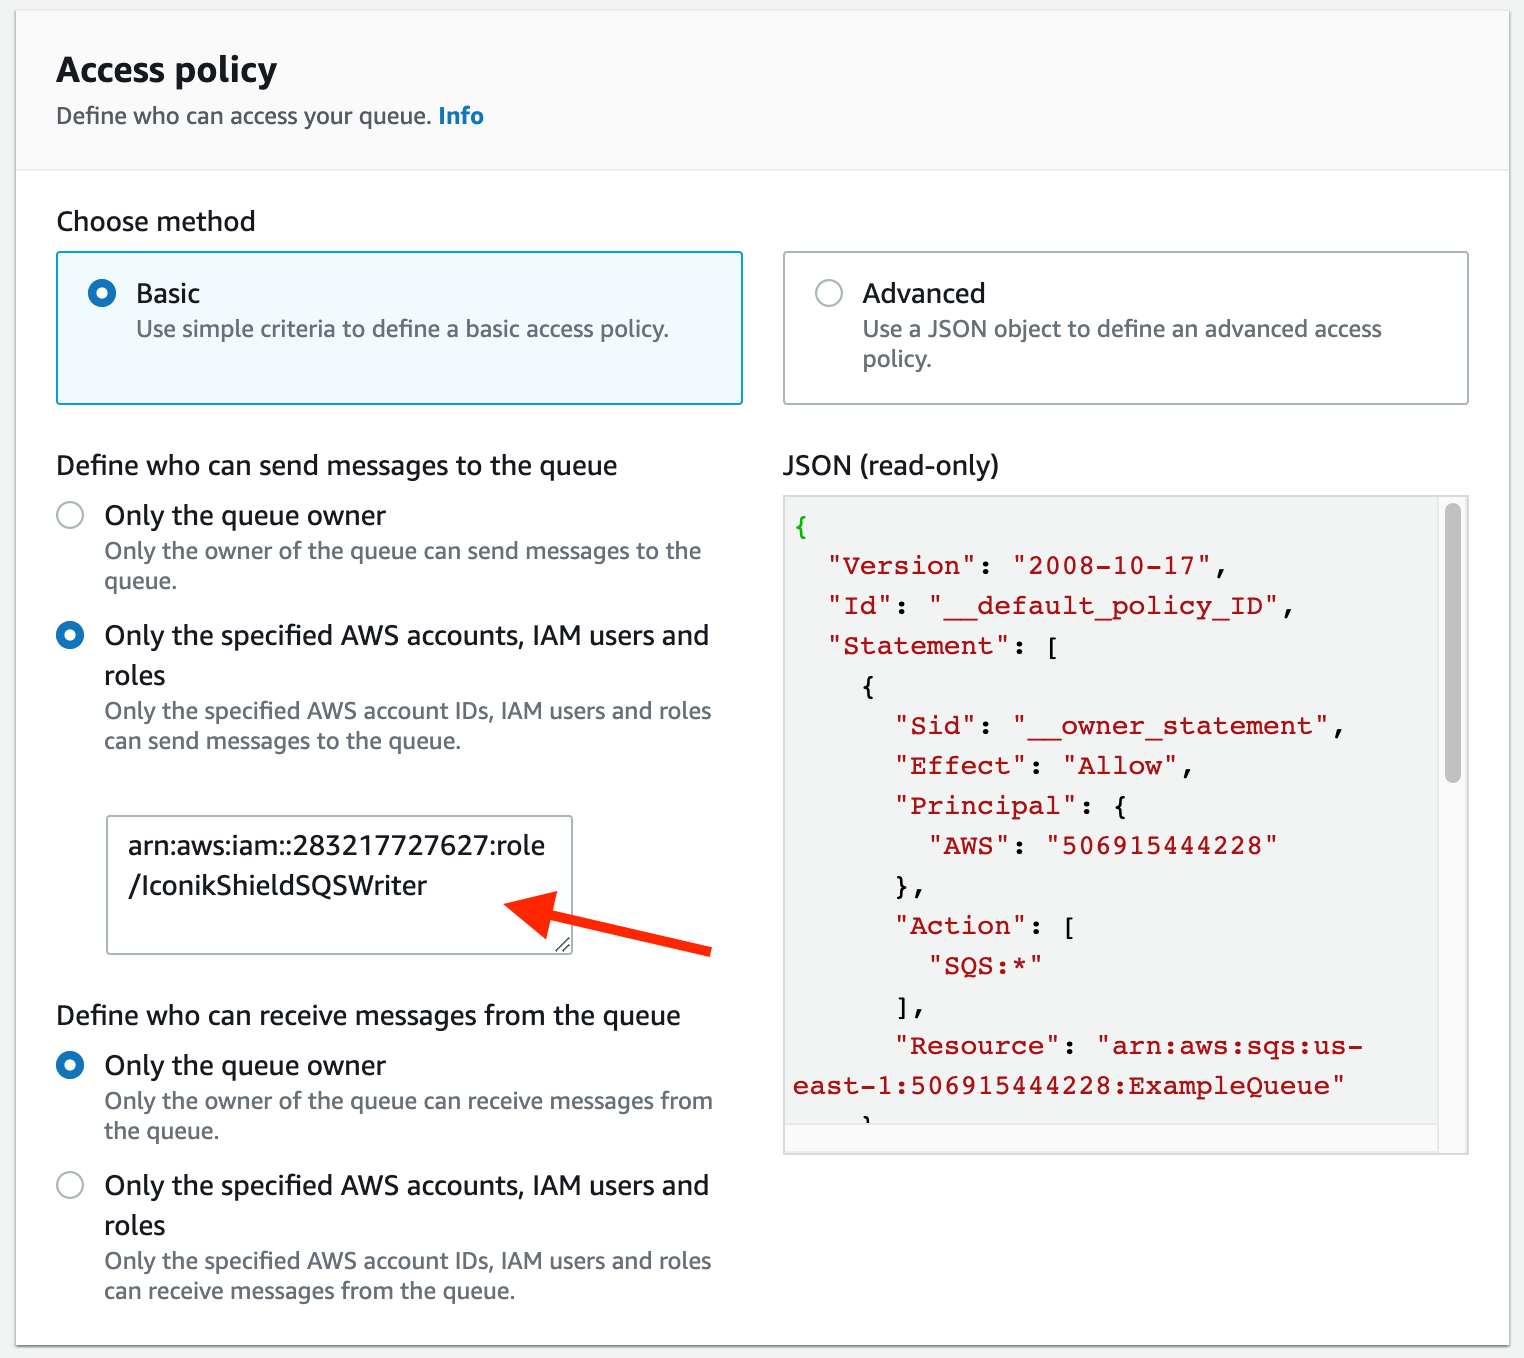
- Configure receiver access as per your local requirements.
- Click Create Queue
- Once the queue is created, open the Access policy tab. Find the statement with Sid
__sender_statementand change the Action clause to:"Action": [ "SQS:SendMessage", "SQS:GetQueueUrl" ],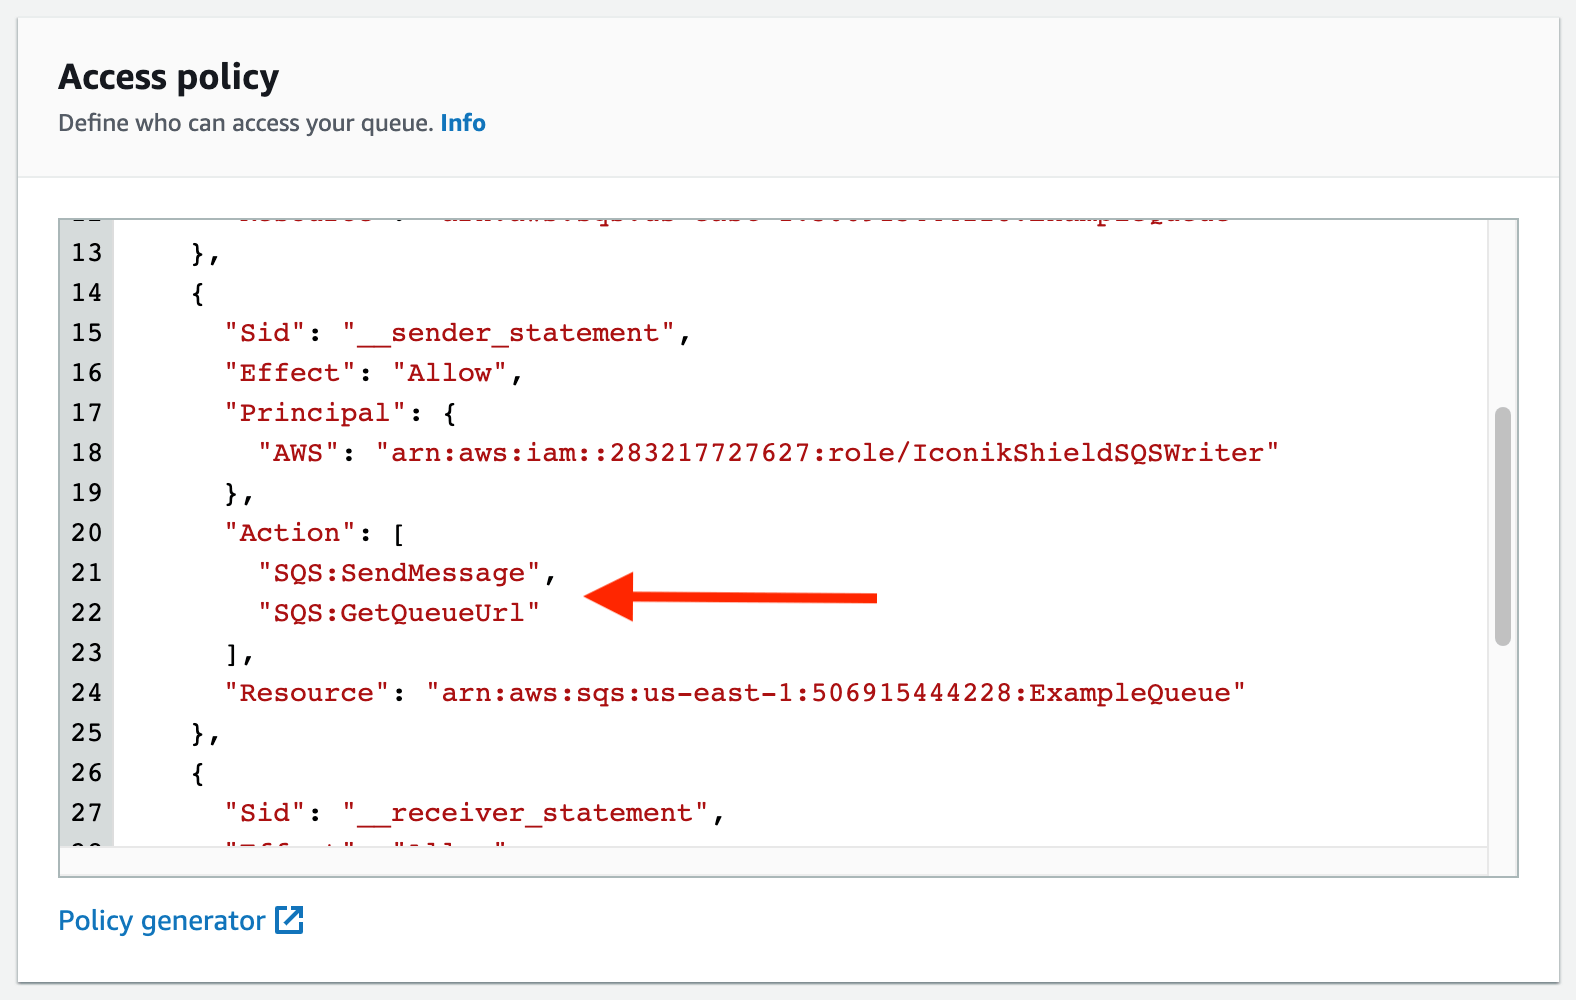
- Click Save
- Make a note of the ARN of the Queue in the Details pane
Configure a Stream Recipient in iconik
Go back to the iconik user interface to configure the streaming recipient
- Click on ADMIN in the top navigation.
- Choose Settings from the left navigation bar.
- This will show the System Settings
- Open the iconik Shield tab.
- Enable iconik Shield if it is not already enabled. There is an associated monthly price to enabling iconik Shield.
- Click on .
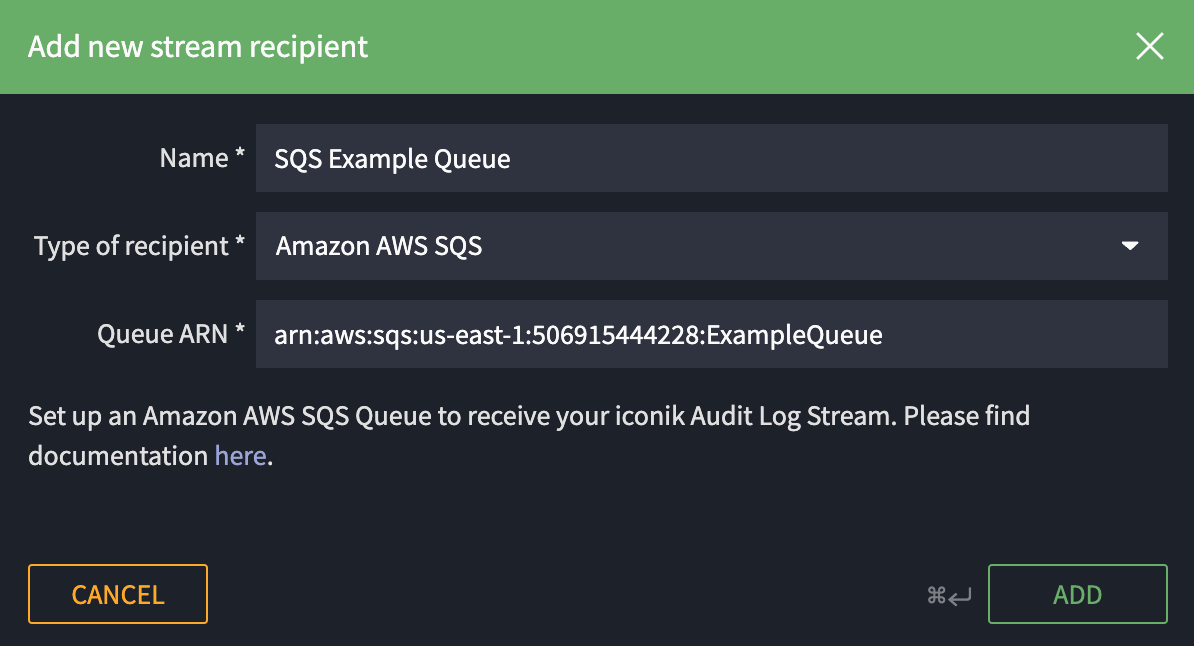
- A modal window opens.
- Enter a name to identify this recipient. This is only used for display purposes.
- Select
Amazon AWS SQS - Enter the Queue ARN you made a note of earlier.
- Click